How To Connect Virtual Reality To PC
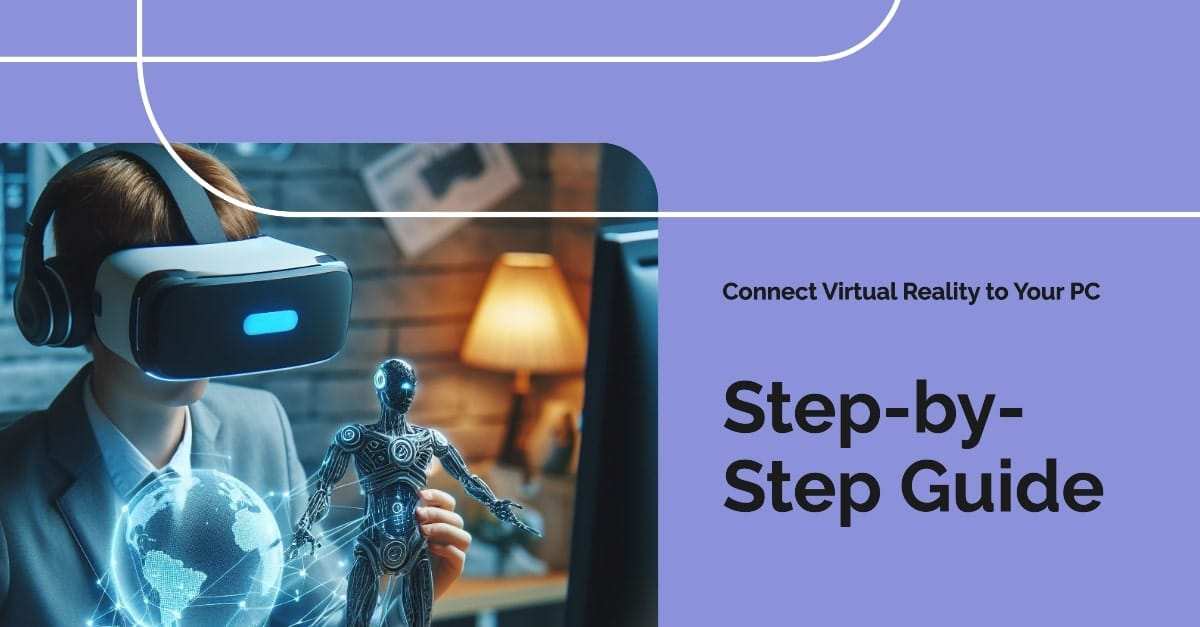
Strap yourself in, thrill-seekers! Virtual Reality (VR) is no longer the stuff of science fiction. With a VR headset and a compatible PC, you can explore fantastical landscapes, battle dragons, or even design the next big architectural marvel – all from the comfort of your living room. But before you dive headfirst into the metaverse, you need to connect your VR headset to your PC.
This guide from ARVRRealm will be your roadmap to VR nirvana. We’ll walk you through the different ways to connect your VR headset to your PC, troubleshoot common issues, and ensure a smooth and unforgettable VR experience.
VR Headsets and Compatibility
Before diving into the connection process, let’s understand the different VR headsets available and their compatibility with PCs. Here’s a quick rundown of some popular choices:
- Meta Quest 2 (formerly Oculus Quest 2): This standalone headset offers a good balance of affordability and functionality. It can operate independently or connect to a PC via cable or wirelessly for an expanded VR experience.
- HTC Vive: A high-end VR system known for its precise tracking and room-scale capabilities. It requires a powerful PC to function.
- Valve Index: Another high-end option from Valve, boasting superior visuals and refresh rates. Like the Vive, it necessitates a powerful PC for optimal performance.
- Windows Mixed Reality headsets: Several manufacturers offer headsets compatible with Windows Mixed Reality, which utilizes inside-out tracking technology. These headsets typically offer a more affordable entry point into PC VR.
It’s crucial to ensure your chosen VR headset is compatible with your PC’s specifications. Check the manufacturer’s website for specific requirements regarding graphics card, processor, and operating system.
Hardware and Software Requirements
Once you’ve confirmed compatibility, let’s gather the necessary hardware and software:
Hardware:
- VR Headset: Your chosen VR headset (Meta Quest 2, HTC Vive, etc.)
- PC: A PC that meets the minimum specifications for your VR headset. This typically involves a powerful graphics card, a strong processor, and sufficient RAM.
- Connection Cable (Optional): A USB-C cable for wired connection (depending on your VR headset).
Software:
- VR Headset Software: Download and install the latest software for your VR headset from the manufacturer’s website (e.g., Meta Quest app for Meta Quest 2).
- SteamVR (Optional): If you plan on playing VR games on Steam, you’ll need to download and install SteamVR.
- Windows Mixed Reality Software (Optional): For Windows Mixed Reality headsets, download and install the Windows Mixed Reality software from Microsoft.
Remember: Downloading the latest software updates for your VR headset and graphics card drivers can significantly improve performance and prevent compatibility issues.
How To Connect Virtual Reality To PC
There are two main ways to connect your VR headset to your PC: wired and wireless. Let’s explore both methods in detail:
Wired Connection:
This method offers the most stable and reliable connection, perfect for fast-paced VR games or applications that require minimal latency. Here’s what you’ll need:
- A VR headset compatible with PC VR: Popular options include Meta Quest 2, HTC Vive, and Valve Index. Double-check your headset’s manual or manufacturer’s website for compatibility information.
- A USB-C cable: Most modern VR headsets use a USB-C cable for connection. If your headset uses a different port, you’ll need an appropriate cable.
- A PC that meets the VR system requirements: VR applications can be demanding on your PC’s resources. Ensure your graphics card, processor, and RAM meet the minimum recommended specs for your specific VR headset. You can find these specs on the manufacturer’s website or https://store.steampowered.com/hwsurvey/Steam-Hardware-Software-Survey-Welcome-to-Steam.
Here’s how to connect your VR headset to your PC using a wired connection:
- Download and install the VR software: Most VR headsets require specific software to function with your PC. Visit the manufacturer’s website and download the latest software for your headset model.
- Power on your VR headset and PC.
- Connect the USB-C cable to a USB-C port (USB 3.0 or higher recommended) on your PC. Plug the other end of the cable into the designated port on your VR headset.
- Launch the VR software. The software should automatically detect your connected VR headset. Follow the on-screen instructions to complete the setup process.
Wireless Connection:
Wireless connections offer more freedom of movement, but they can introduce latency (delay) which can be bothersome in fast-paced VR experiences. Here’s what you’ll need for a wireless connection:
- A VR headset that supports wireless PC VR: Currently, only a few VR headsets, like the Meta Quest 2, offer this functionality.
- A strong and stable Wi-Fi network: For a smooth VR experience, a 5 GHz Wi-Fi network with a strong signal is crucial. Consider using a dedicated router for optimal performance.
- Optional: A Wi-Fi 6 router: While not essential, a Wi-Fi 6 router can further reduce latency and improve your wireless VR experience.
Here’s how to connect your VR headset to your PC wirelessly (using Meta Quest 2 as an example):
- Download and install the Oculus PC app: This app acts as a bridge between your Meta Quest 2 headset and your PC. Download it from the Meta website.
- Ensure your VR headset and PC are connected to the same Wi-Fi network.
- Open the Oculus PC app on your PC.
- On your VR headset, navigate to the Settings menu and select “System.”
- Choose “Quest Link” and then enable “Air Link.”
- The Oculus PC app should detect your VR headset. Click “Launch” to begin using your VR headset wirelessly.
HOW TO CONNECT VIRTUAL REALITY TO PC WITH USB?
You can definitely connect your VR headset to your PC using a USB cable for a wired connection! This method offers the most stability and least latency, making it ideal for fast-paced VR games and applications. Here’s a breakdown of what you’ll need and the steps to follow:
What You’ll Need:
- VR Headset Compatible with PC VR: Popular options include Meta Quest 2, HTC Vive, and Valve Index. Check your headset’s manual or manufacturer’s website for confirmation.
- USB-C Cable: Most modern VR headsets use a USB-C cable for connection. If yours uses a different port, you’ll need the appropriate cable.
- PC Meeting VR System Requirements: VR can be demanding on your PC’s resources. Make sure your graphics card, processor, and RAM meet the minimum recommended specs for your specific VR headset. You can find these specs on the manufacturer’s website or by visiting https://store.steampowered.com/app/250820/SteamVR/.
Steps to Connect:
- Download and Install VR Software: Most VR headsets require specific software to function with your PC. Visit the manufacturer’s website and download the latest software for your headset model.
- Power Up: Turn on both your VR headset and your PC.
- Connect the Cable: Plug the USB-C cable into a USB-C port (USB 3.0 or higher recommended) on your PC. Connect the other end of the cable to the designated port on your VR headset.
- Launch VR Software: Open the VR software you downloaded earlier. It should automatically detect your connected VR headset. Follow any on-screen instructions to complete the setup process.
Bonus Tip: If you’re using a Meta Quest 2 and want to ensure a smooth wired connection, consider purchasing the official Oculus Link cable. It’s designed specifically for this purpose and may offer optimal performance compared to generic USB-C cables.
By following these steps, you should be able to connect your VR headset to your PC using a USB cable and enjoy an immersive VR experience!
How To Connect Quest 3 To PC?
There are two main ways to connect your Meta Quest 3 to your PC: wired and wireless. Both offer unique advantages, so let’s explore which method suits you best:
Wired Connection with a USB Cable:
This method provides the most stable and reliable connection, perfect for competitive VR games or applications that require minimal lag. Here’s what you’ll need:
- Meta Quest 3 VR headset: Make sure it’s charged and ready to go!
- USB-C cable: Most Meta Quest 3 units will come with one, but double-check. Ensure it’s a high-quality USB-C cable, preferably USB 3.0 or higher for optimal performance.
- VR-ready PC: Check if your PC meets the minimum recommended specs for the Meta Quest 3. You can find these specs on the Meta website or by searching online.
Steps to Connect with a USB Cable:
- Download and install the Oculus PC app: This app acts as a bridge between your Meta Quest 3 and your PC. Head to the Meta website and download the latest version for your PC.
- Power on your VR headset and PC.
- Connect the USB-C cable to a USB-C port (USB 3.0 or higher recommended) on your PC. Plug the other end of the cable into the designated port on your Meta Quest 3.
- Launch the Oculus PC app. The app should automatically detect your connected VR headset.
- Follow the on-screen instructions to complete the setup process. This might involve allowing access to your PC and confirming a pairing code between your devices.
Wireless Connection with Air Link:
If you prefer more freedom of movement in VR, a wireless connection is the way to go. However, keep in mind that wireless connections can introduce some latency (delay). Here’s what you’ll need:
- Meta Quest 3 VR headset: Ensure it’s charged and has Wi-Fi enabled.
- Strong and stable Wi-Fi network: A 5 GHz Wi-Fi network with a strong signal is crucial for a smooth VR experience. Consider using a dedicated router for optimal performance. A Wi-Fi 6 router can further reduce latency, but it’s not essential.
Steps to Connect with Air Link:
- Download and install the Oculus PC app as mentioned earlier.
- Ensure your VR headset and PC are connected to the same Wi-Fi network.
- Open the Oculus PC app on your PC.
- On your VR headset, navigate to the Settings menu and select “System.”
- Choose “Quest Link” and then enable “Air Link.”
- The Oculus PC app should detect your VR headset. Click “Launch” to begin using your VR headset wirelessly.
Choosing the Right Connection Method:
- For stability and minimal lag: Wired connection is the clear winner.
- For more freedom of movement: Wireless with Air Link offers greater flexibility. However, prioritize a strong Wi-Fi network for a smooth experience.
Bonus Tip: Regardless of the connection method you choose, make sure your VR playspace is clear of obstacles and well-lit to avoid any bumps or bruises during your VR adventures!
How do I know if my PC is compatible with VR?
To determine if your PC is compatible with VR, you’ll need to check if it meets the minimum hardware requirements for the VR headset you intend to use. Here’s a general guide to help you:
- Check the VR Headset Manufacturer’s Requirements: Each VR headset has specific requirements. For example, the Oculus Rift S recommends at least an NVIDIA GTX 1060 or AMD Radeon RX 480 graphics card, an Intel i5-4590 or AMD Ryzen 5 1500X processor, and 8GB of RAM.
- Use Compatibility Check Tools: Some VR platforms offer tools to automatically check your system. For instance, Valve provides the ‘Are you ready for Valve Index’ app on Steam.
- Manual Check: Press the Windows button and type “mixed” to access the Mixed Reality Portal app, which can run a compatibility check for you.
- Know Your PC’s Specs: You should know your PC’s specifications, including the CPU, GPU, RAM, USB ports, and operating system. This information is crucial for comparing against the VR headset’s requirements.
Remember, VR gaming is more resource-intensive than traditional gaming due to higher render resolutions and the need to maintain a consistent frame rate for a comfortable experience. If you’re unsure about your PC’s specs or how to find them, you can look up how to access this information through your computer’s system settings.
How do I enable VR on my PC?
There actually isn’t a specific setting on your PC to “enable VR.” VR functionality depends on two main things:
- VR Headset: You’ll need a VR headset compatible with your PC. Popular options include Meta Quest 3, HTC Vive, and Valve Index. Make sure your headset is designed for PC VR use.
- VR Software: Once you have a compatible headset, you’ll need software to connect it to your PC and run VR applications. This software varies depending on your VR headset brand. Here are some examples:
- Meta Quest 3: Requires the Oculus PC app downloaded from the Meta website.
- HTC Vive: Uses SteamVR, which comes bundled with the SteamVR software installation.
- Valve Index: Also utilizes SteamVR.
Here’s a breakdown of the typical setup process:
- Connect your VR headset to your PC: This can be done via a USB cable for a wired connection (most stable) or wirelessly through Wi-Fi (more freedom of movement but with potential latency). Refer to your VR headset’s manual or manufacturer’s website for specific connection instructions.
- Install the VR software: Download and install the software specific to your VR headset brand (e.g., Oculus PC app for Meta Quest 3).
- Launch the VR software: Once installed, run the VR software. It should automatically detect your connected VR headset and guide you through any initial setup steps. This might involve pairing your devices or allowing access to your PC.
- Run VR applications: After completing the setup in the VR software, you can launch VR games or applications compatible with your PC VR headset. These can be found on platforms like SteamVR or the Oculus Store (for Meta headsets).
By following these steps and ensuring you have the necessary hardware and software, you’ll be well on your way to experiencing the wonders of VR on your PC!
How do I access my PC VR?
There are two main ways to access your PC VR library, depending on the VR software you’re using:
1. Through your VR Software:
Most VR software platforms, like Oculus PC app or SteamVR, act as a hub for launching your PC VR games and applications. Here’s a general process:
- Launch your VR software. (e.g., Oculus PC app, SteamVR)
- Put on your VR headset. Ensure it’s properly connected and turned on.
- The VR software interface should appear in your headset. You’ll typically see a virtual environment or menu within your VR headset.
- Locate the “Library” or “Games” section. This section will display all your installed VR-compatible games and applications. It might be represented by icons or listed within a menu.
- Select the VR game or application you want to launch. Use your VR headset’s controllers to navigate and make selections.
- The VR experience will launch within your headset. Enjoy your virtual adventure!
2. Launching directly from Steam (for SteamVR games):
If you own VR games on Steam, you can also launch them directly through the Steam client without needing to go through SteamVR first. Here’s how:
- Open the Steam application on your PC.
- Navigate to your “Library” section.
- Filter your games by “VR” to see only your VR-compatible titles.
- Right-click on the VR game you want to launch and select “Play in VR.”
- SteamVR will automatically launch, and the VR game will start within your headset.
Here are some additional tips for accessing your PC VR library:
- Make sure your VR headset is turned on and properly connected to your PC before launching the VR software or games.
- Some VR software might require you to be within the designated VR playspace before launching applications. This ensures your safety during VR experiences.
- VR games might require additional setup or calibration steps within the VR software or the game itself. Follow the on-screen instructions to get the best experience.
How to install VR games?
Installing VR games depends on the platform you purchase them from, but the general process remains similar. Here’s a breakdown for the two most common VR storefronts:
Installing VR Games from SteamVR:
- Launch the Steam client on your PC.
- Log in to your Steam account if you haven’t already.
- Click on the “Store” tab at the top of the Steam window.
- In the search bar, type “VR” or browse the “VR” category on the Steam Store homepage to find VR games.
- Once you find a VR game you’d like to purchase, click on it. This will take you to the game’s dedicated Steam Store page.
- Review the game’s information, system requirements, and user reviews. Ensure your PC meets the minimum specs to run the VR game smoothly.
- If you’re happy to proceed, click the green “Add to Cart” button.
- Follow the on-screen prompts to complete your purchase. You might need to enter your payment information or confirm your Steam Wallet purchase.
- Once purchased, the VR game will appear in your Steam Library. 1 Click on the “Library” tab in the Steam client.
- Locate the VR game you just purchased in your library.
- Click the “Install” button next to the game title.
- Choose the installation location on your PC’s storage drive (ensure you have enough free space).
- Steam will download and install the VR game files. This process can take some time depending on your internet speed and the game’s size.
- Once the installation is complete, you’ll see a “Play” button next to the VR game title in your Steam Library.
Installing VR Games from the Oculus Store (for Meta headsets):
- Launch the Oculus PC app on your PC.
- Log in to your Meta account associated with your VR headset.
- Click on the “Explore” tab in the Oculus PC app.
- Browse the Oculus Store for VR games. You can use the search bar or browse by category (e.g., Action, Adventure, etc.). There’s also a dedicated “VR” section for easy filtering.
- Click on a VR game that interests you to view its details, screenshots, and user reviews.
- If you decide to purchase the game, click the blue “Get” button.
- You might need to confirm your purchase using your preferred payment method or Meta account balance.
- The VR game will download and install automatically through the Oculus PC app. You’ll see the download progress displayed in the app.
- Once installed, the VR game will appear in your Oculus PC app Library.
- You can launch the VR game directly from the Library section within the Oculus PC app.
Troubleshooting Common Connection Issues:
If you encounter problems connecting your VR headset to your PC, don’t fret! Here are some common troubleshooting tips:
- Ensure all cables are securely connected: Double-check that the USB-C cable is firmly plugged into both your VR headset and PC.
- Restart your VR headset and PC: A simple restart can often resolve software glitches that might be hindering the connection.
- Verify software compatibility: Make sure you’re using the latest versions of the VR software and your PC’s graphics drivers. Outdated software can cause connection issues.
- Check for system updates: Ensure your operating system is up to date on both your PC and VR headset. System updates can sometimes include fixes for connectivity issues.
- Switch USB ports: If you’re using a wired connection and experiencing issues, try plugging the USB-C cable into a different USB port on your PC. Sometimes, certain ports may provide a more stable connection.
- Adjust Wi-Fi settings: If you’re using a wireless connection and experiencing lag or disconnections, try moving closer to your Wi-Fi router or adjusting its settings to prioritize VR traffic.
- Update router firmware: If you’re using a wireless connection, ensure your router’s firmware is up to date. Router firmware updates can improve performance and stability.
- Disable background applications: Close any unnecessary applications running on your PC that might be consuming bandwidth or processing power, which can interfere with your VR experience.
- Contact customer support: If you’ve tried all the troubleshooting steps and still can’t resolve the issue, reach out to the customer support channels provided by your VR headset manufacturer or PC components manufacturer for further assistance.
FAQ – How To Connect Virtual Reality To PC
What VR headsets can be connected to a PC?
Popular VR headsets that can be connected to a PC include Meta Quest 2, HTC Vive, Valve Index, Oculus Rift, and Windows Mixed Reality headsets. However, compatibility may vary, so it’s essential to check the manufacturer’s specifications for each headset.
Can I connect my VR headset to my PC wirelessly?
Yes, some VR headsets, like the Meta Quest 2, offer wireless connectivity to a PC. However, this feature may not be available for all VR headsets, and wireless connections can introduce latency, affecting the VR experience.
What are the system requirements for connecting a VR headset to a PC?
The system requirements vary depending on the VR headset you’re using. Generally, you’ll need a PC with a powerful graphics card, a compatible processor, and sufficient RAM. Check the manufacturer’s website or documentation for specific system requirements.
How do I troubleshoot connection issues between my VR headset and PC?
If you’re experiencing connection issues, try the following troubleshooting steps:
Ensure all cables are securely connected.
Restart your VR headset and PC.
Verify software compatibility and update both VR software and PC drivers.
Check for system updates on your PC and VR headset.
Switch USB ports if using a wired connection.
Adjust Wi-Fi settings or move closer to the router for wireless connections.
Update router firmware.
Close unnecessary background applications on your PC.
Contact customer support for further assistance if needed.
Can I use a VR headset with a laptop?
Yes, you can use a VR headset with a laptop, provided that the laptop meets the system requirements for the VR headset. However, laptops may have limitations in terms of performance compared to desktop PCs, which could affect the VR experience.
Are there any additional accessories required for connecting a VR headset to a PC?
In addition to the VR headset and compatible cables, you may need accessories like motion controllers for certain VR experiences. Some VR setups also benefit from accessories like VR sensor stands or mounts for improved tracking. Check the requirements of your specific VR setup for any additional accessories needed.
Conclusion – How To Connect Virtual Reality To PC
Connecting your VR headset to your PC opens up a world of immersive experiences, from gaming to productivity to social interaction. Whether you prefer a wired or wireless connection, following the steps outlined in this guide will help you unleash the full potential of your VR headset.
Remember, troubleshooting connection issues is part of the journey to VR nirvana. With patience and persistence, you’ll soon be diving into virtual worlds with ease. So, grab your headset, fire up your PC, and get ready to embark on an unforgettable journey through the metaverse!


2 Comments